Showing posts with label desserts. Show all posts

Saturday, January 19, 2013

Amazing glutenless almond-based chocolate chip cookies


I love cookies. I do. Unfortunately, I now know that sugar is far too ubiquitous and far too deceitfully camouflaged in so many food items, for it to be harmless. There is sugar in soda, we know that. But if you try to get around it with diet soda, you open a whole can of worms with artificial sweeteners, most of which are far worse for you than sugar. If you're wondering why, read Kimberly's short article.

And yes, there's sugar in cakes, cookies and other sweets. We know this too. When I was young, these things were to be enjoyed occasionally, at someone's birthday or some special event. We certainly didn't have cookies every day. Now, it seems there isn't a day when there aren't cookies, donuts, cakes or some such seductive treat around the office. I thought to myself that if I have good self restraint and limit my portions, that there was nothing wrong with it. But as I became more aware of the range of sugar-containing food items out there, I became alarmed. I now cringe at how challenging it is to avoid sugar, and how miserable my life would be if I chose to avoid sugar completely. Not only would it turn me into a social outcast, but it would also make me a frustrated grocery shopper, because - are you reading those labels carefully? - pretty much everything contains sugar. Even things that make you scratch your head, like tomato soup!

How did we get to this? I was at Starbucks the other day and wanted to buy a snack to go with my coffee, as I've done so many times before. But this time, I had my sugar radar on. So I scanned the pastry window in search of a sugarless treat, perhaps even (is this wishful thinking?) some salty pastry of sorts. Tough luck. The only sugar-free snack at our Starbucks were the bagels (and even some of those might be sweetened, for all I know). Their bagels are quite good and I'm sold for the Multigrain kind in particular, but I would appreciate more choices nonetheless. Do we really have to add sugar to everything?


To limit my sugar intake, as well as to make a point that I think deserves to be made, I now use less processed and milder sweeteners, and in smaller amounts. One of these is Stevia, of which my favorite variety is the Vitamin Shoppe liquid form. It had the least amount of bitterness  from all I've tasted. Another sweeteners I use are coconut nectar and coconut crystals. These are unrefined sweeteners that are just as sweet as brown sugar. They don't have a coconutty taste at all. But they are quite expensive. The 'Coconut Secret' brand I buy from Whole Foods is about $8 for 14 oz. So you end up using less, because it's precious, and in the end that is a good thing - you know what I mean? We need to re-educate our palates, which are so ridiculously poisoned by sugar, salt and fat in excess, and remind them how to taste subtle flavors. So, to illustrate, these cookies are killer, and not a drop of sugar in them!


Amazing glutenless almond-based chocolate chip cookies
~ makes 16 cookies

1 1/2 cups almond meal (or almond flour)
1/2 cups coconut flour
3/4 cup coconut crystals (or brown sugar, if you must)
1 4-oz 100% cacao unsweetened chocolate baking bar (Ghirardelli works)
1 tsp baking soda
1 tsp baking powder (aluminum free!)
1/2 tsp salt
1 cup raw creamy almond butter (Trader Joe's works)
2/3 cup coconut oil, melted
1/4 cup coconut milk (or almond milk)
1 tsp vanilla extract


In a heavy mortar, start to smash the chocolate bar with the pestle into small chunks, square by square. In the end, you'll end up with about a cup of chunks (you can just buy chocolate chunks if you like, instead of going through this). Whatever you do, do not buy any chocolate with sugar in it - kind of defeats the purpose.


Mix the dry ingredients together in a large bowl, including the chocolate chunks.

Take another bowl and add the almond butter, coconut oil, coconut or almond milk and vanilla extract in there. Use a fork to whip everything together so the oil and butter combine well.


Add this to the dry ingredients and mix everything into a dough. It's going to be an oily dough, but if you find that it's disgustingly oily you can correct that with a few sprinkles of coconut flour.

Now take a large tray and grease it with coconut oil or line it with parchment paper. Take the dough and mold it into approximately 16 delicate cookies, trying to push the chocolate chunks inside as much as possible, because otherwise they "bleed" chocolate everywhere during the baking process.

Bake at 350 for about 25 minutes. You know they're ready when they are lightly amber around the bottom. Let them cool completely before removing from the sheet. They'll be very fragile when you first pull them out. 

On a final note, these might be pretty expensive cookies to make, but they might just be the best I've ever had (and I've had a LOT). I think - and I'm not leading you astray here - everyone should make these at least once in their life.

Recipe adapted from Jenny @ the Clean Blog.

Any questions? Leave a comment!

Thursday, December 27, 2012

Apple & blackberry cobbler


Yes, the holidays were terrific. There was snow and food and family around the table, good humor and stories. Nothing missing, really. Except in the aftermath of the many tastings of meats and cheeses that were inevitable, and the ravenousness for sarmale that ensued, I found myself lacking in drive and energy to exercise. Not even a little. Usually, not a day goes by for me without doing some sort of activity. Whether it's the gym, running, a trip with the bike, lifting some weights at home, playing badminton or going for a swim, I find it a real challenge to make it 24 hours without my drug. That is just how I'm made, I suppose.

It wasn't until last night that I put on my gear and went out for a short jog in the snow - or rather, slush. The cold gave me speed, and the frozen air filling my lung was like some sort of dreamy hookah delight. I felt like I'd been reborn. And I was also disappointed in myself for letting so much time go by without exercise. So I did what any person who's ever had exercise-guilt does in order to live with themselves: I blamed it on the food.

Now, I've no more excuses. Here is a light and fluffy recipe to help you recover from the food coma of the holidays. Only 15 minutes prep time, by the way! You can enjoy this as dessert, but it's also substantial enough to be a whole meal. Take my word for it. And now, get up and get moving!


Apple & blackberry cobbler
~ serves 4

5-6 small (or 4 large) apples, any variety, chopped
1 1/2 cups frozen blackberries (organic! Remember the Dirty Dozen)
2 tsp coconut oil
1 tsp cinnamon
a few drops stevia or 1 Tbsp brown sugar, optional (don't make it too sweet. You can always add powdered sugar on your plate if you need it)
juice from 1/2 lemon or lime
1 cup almonds
1 cup hazelnuts or walnuts (or any other combination of 2 nuts)
2 Tbsp shredded coconut
1/2 tsp cinnamon
1 tsp vanilla extract


In a large bowl, toss the apples with the cinnamon, stevia or brown sugar (optional) and lemon juice. Add the blackberries and mix gently. 

In a Vitamix, blender or grinder, add the nuts, coconut, cinnamon and vanilla and pulse until crumbly. 

Coat an oven-safe Pyrex pan or loaf pan (glass is best) with coconut oil and pour the fruit filling in there.

Sprinkle the nut mixture on top. Bake in a 350 degree oven for about 40 minutes, until the top has a nice amber color. To avoid it getting too dry, you can cover the pan (with lid or foil) for the first 20 minutes, and then leave it uncovered for the last 20 so the top can get crispy.


Happy Holidays!

Recipe adapted from Jenny @ the Clean Blog.

Tuesday, October 16, 2012

Beer muffins


Living in Albuquerque is just like living by the ocean, only without the ocean. Each time I'm driving (and it doesn't happen too often), I expect to take a turn and see the great blue at the end of the road. I don't know why this is. Maybe the relentless sun and soothing dry air fool me. I can almost taste the salt in the air. But even though no roads ever lead to the ocean around here, one of my favorite things to do on weekends is to start toward a brewery on two wheels. Only the desert, the open road and the promise of beer at destination.

And since I'm a beer zealot and make no secret of it, I decided to made beer muffins. Truth be told, it wasn't my idea. I came across Kate's recipe for beer biscuits and my interest was totally piqued, especially because the process is so simple. Mix and bake! Kate spiced these up with rosemary and she also had the genius idea to add cheese into the mix. My mouth waters just thinking about it. I on the other hand have become fond of herbes de Provence ever since the herbal crackers, so I was itching to see what else this versatile spice goes well with. I decided to go simple.


I used a porter beer I like from Whole Foods. If you choose this type of darker beer, your muffins will be slightly bitter. I happen to enjoy that, but you might not. If you're wavering, or if you're not that knowledgeable about beer, go for a blonder variety the first time. I personally look forward to making these with a nice stout!

For all you beer fans out there, I recommend this documentary. It's like a giant commercial for beer, but it will tell you many things you didn't know about your beloved drink.


Beer mufins
~ makes 12 muffins

3 cups organic whole wheat flour

1 tsp salt
2 Tbsp brown sugar
1 Tbsp baking powder

2 Tbsp herbes de Provence
1 12-ounce bottle of blonde (if you prefer a milder taste) or porter (if you prefer a bolder flavor) or even stout (if you're really edgy) beer

Mix flour, salt, sugar, baking power and spices with a fork. Add the beer and blend well. Pour into lightly greased muffin pan and bake at 375 for 30 minutes or until golden brown.


These will work best warmed up, with butter. Don't go crazy on the butter though, it's not good for you and you know it.

Recipe adapted from Cookie and Kate.

Sunday, September 9, 2012

Very important chocolate gluten-free muffins


I. Want. To. Eat. All. The. Muffins. In. The. World.

As many strides as I have made in keeping faithful to a wholesome diet, I have not managed to kick off my stubborn, incessant craving for sweets. There is no limit to how much chocolate I could eat in any given day. Enough is simply not in my vocabulary when it comes to that sort of thing. For a person so otherwise rational and composed as most people know me as, this is entirely out of character, and it irks me endlessly. It's like an annoying thing you catch yourself doing all the time, but somehow you can't stop.

So I have proceeded to discipline myself as if I were a dog in need of training. As a first step, I put signs throughout the house reminding me of how shameful my addiction is. "Chill out with the chocolate" says the one on the front door. "Don't you dare open that!" says one pasted to the very desk where I'm writing this. "WTF! No more sweets!" says the one on the fridge, emphatically. 

The second step is to promise myself a reward if I am good and follow the rules. "If I don't have this piece of chocolate right now, I can have a muffin tomorrow morning!" Delayed gratification works wonders, really, for dogs as much as for humans. Another thing I do is to make myself feel bad after I've done something excessive, like going bananas over the Nutella jar and managing to make myself nauseated, yet somehow, somehow, still craving the damned sweet stuff.

I've got to say, I understand quite well what makes dogs happy. First, it's looking forward to things - and then, getting them. Like when they wait for us to come home from work and at the very jingle of the keys in the lock they go bonkers against the door, jumping and tail-wagging and getting so ridiculously excited. When I finally allow myself a piece of cake or some such, I know exactly how a dog feels. And I have to say, what that piece of cake means to me is more than words can describe. It's no longer food, it's an entire experience of built-up anticipation and heavenly taste, and my delight at having managed to abstain so bravely, to withstand withdrawal and to circumvent the temptation that is everywhere around me.


This is how I've enjoyed these brilliant gluten-free chocolate muffins. Like rare delicacies - not like something to be chomped on and gulped down, but like a delicate, elaborate dessert that a French chef made especially for me. I made every muffin mean a great deal. And I encourage you to do the same when you make these (because you will!). They are not only delicious, they are also very important.

Gluten-free nutty chocolate muffins
~ makes 12 muffins


1/2 cup butter, melted
1/2 cup honey
1/2 cup cocoa powder
3/4 cup almond butter
4 large eggs
1/2 teaspoon baking soda
1 cup carob chips


Preheat oven to 350.

Mix together butter and honey. Whisk in cocoa powder and almond butter until smooth. Whisk in eggs and baking soda.
Pour into greased muffin tray. Bake for 20 minutes until done.


Recipe adapted from the talented Michelle @ Gluten-Free Fix.

Note: The only changes I made to Michelle's recipe were to replace peanut butter with almond butter and chocolate chips with carob chips. I find peanuts problematic because of fungi and allergies, so I prefer to use almonds/almond butter whenever a recipe calls for peanuts/peanut butter. Also, I prefer carob chips because they are caffeine-free and I also love their malty taste.

Monday, August 13, 2012

Apple pie, from start to finish


The smell of coffee and pastries in the morning is so chic. So French. But they've got to be flaky, delicate pastries. Bulky, doughy things that fill your mouth like cotton balls don't count. A donut is not a pastry, but a boorish bread whose texture baffles your tongue so as not to object to its objectionable sweetness. Americans can't get desserts right. They are either too sweet, too colorful, too large, too something. There's always something bothersome about them, something excessive and gratuitous that makes you feel both guilty and empty in the aftermath.

Even though I'm sold for pastries and coffee every now and then, lately I've found this sort of treat very infrequent. One reason is that it's a struggle to find decent pastries in the States. The other reason is, this type of food is not exactly encouraged by the Beauty Detox Solution. And it's too bad. But a treat that I allow myself every now and then, because I can make it myself and I make it well, is apple pie. I have a slice for brunch with some nicely spiced Rooibos tea. They go so well together. And the pie, of course, I make myself from start to finish.

Apple pie
~ serves 8

Filling:
10-12 medium organic apples, peeled and cut into slices
2 Tbsp lemon juice
1/2 cup brown sugar
1 Tbsp organic flour (or verified non-GMO)
1 tsp cinnamon
1/2 tsp nutmeg

Crust:
1 cup (2  8-oz sticks) unsalted butter, very cold
2 1/2 cups organic flour (or verified non-GMO)
1 tsp salt
6-10 Tbsp ice-cold water

In a large bowl, mix the apples well with the lemon juice, sugar, flour and spices. This is your filling. Cover and set aside.


In another bowl, mix the flour and salt with a fork. Add the butter stick, cut into 8 chunks or so. We are going to cut the butter into the flour, as it were. The goal is to get pea-sized pieces of butter distributed throughout the mixture. This will make the crust flaky like it's supposed to be. If you have a pastry tool, lucky you. For the rest of us, take a butter knife in each hand and begin to cut into the butter with the knives going in opposite directions, so that they are crossing each other side by side. 

Once you got the butter into pea-sized pieces and evenly distributed, it's time to get the cold water into the mix. It's important that the water be as cold as possible, so add an ice cube in for good measure. For the next part you will use a fork. Add the cold water, one tablespoon at a time, incorporating it with the fork in a whipping motion. We just want to moisten the dough, but we don't want to mash the butter pieces. Add water until you feel the dough could be easily gathered into a ball without crumbling. 

At this point, divide the dough into a larger ball and a smaller one. Prepare a clean, dry surface and spread flour on it. Generously. Press the ball on the flat surface and with a rolling pin begin to roll it into a circle. The dough will break at the edges, so you will have to pamper it and mend it all the time, until it spreads into a circle large enough to fill your pie plate. Do this with patience and don't start to cry. We are almost there. 

Now you're going to move the dough into the pie plate. If it breaks in the process, don't panic. You can stitch it back together, I promise. With the rolling pin, start to roll the dough off the surface, wrapping it around the rolling pin. If you notice it's sticking to the flat surface, take a wide knife or spatula and help it a little. You will wish you had five hands for this, I know. Once you've rolled 3/4 of the dough onto the rolling pin, you're golden. Lift the rolling pin gently and move the dough (in one piece, hopefully) onto the pie plate, unwrapping it off the rolling pin at the same time. 


If you are a ninja, the dough will lay perfectly into the pie plate. For the rest of us, we'll have to pull onto the dough a little to set it in evenly. Set the filling into the pie plate. And now it's also time to preheat your oven to 400.


Repeat the above process with the smaller ball of dough, which will be the lid of your pie. Spread it to the right size, and slide it onto the pie plate to cover the filling. If you'd like to make a nice pattern on the edge, press the bottom and top together on the sides and then make a wavy design with your fingers, like I did:


With a knife, make a few slits on top but very carefully so as not to break the dough and make the whole thing ugly. Shove it in the 400 degree oven, wipe the sweat off your forehead and go read a magazine for 15 minutes. Then, lower the temperature to 375 and fold some aluminum foil over the outer edges of the pie. This prevents the edges from burning. Now kick it back into the oven and go take a nap. The pie will sit in there for 30 more minutes or until golden-brown. Let it cool for at least 1 hour before serving. And be proud of yourself! Making pastry is no piece of cake.


Saturday, June 30, 2012

Quick no-bake chocolate ginger cake


Do you remember going to birthday parties when you were young? The thrill of that morning, the arrival at your friend's house, when all the other kids would flock to greet you and would then take you by the hand and carry you away from your parents, who'd be wandering off with the other parents toward another corner of the house where there'd be chatting and martini glasses, while you'd be off to much more exciting water balloons and running games. And then, as the party drew to an end, everyone would turn a bit lethargic and gloomy, and the games would be lessened by a note of sadness because it would soon be time to go. But fortunately, there was always cake to cheer everyone up. And it always did, because despite all its offences to do with calories and sugar and cholesterol and food coloring and whatnot, cake has an irresistible lure of instant gratification. Were those birthdays any different for you?

The other day I made a cake that I'm planning to make again on my birthday. It really was that good. This is one of Kim Snyder's recipes, but I don't have a food processor so I tweaked the recipe a bit to work for me. I especially love the concept of making a raw cake, because this also means: no flour! What? Cake without flour's blasphemy, you're thinking. Well, not exactly. This particular recipe uses almonds and walnuts as a base and coconut nectar to hold the whole thing together. Ah, and avocado to make the frosting! I'd like to have a slice of this every day for the rest of my life, please.

Raw chocolate ginger cake
~ serves 6

1 cup almonds
3/4 cup walnuts
1/4 cup raw cacao (actual cacao powder, not hot chocolate mix or some other sugary powder)
1/4 tsp sea salt
2 tsp grated ginger root
3 Tbsp coconut nectar (or thick maple syrup; don't use agave)
5 Medjool dates, pitted and minced
1/8 cup coconut oil
1 tsp vanilla

Frosting:
1 small avocado, scooped out
3 Medjool dates, pitted and chopped
2 Tbsp raw cacao
1/4 cup coconut nectar (or maple syrup)

Before we begin: this is not a pretty process, especially if you don't have the right tools. You need muscle and it will get messy. If you feel like giving up, you just have to tell yourself that it will all be worth it. Because it will.

I used a coffee grinder to process the almonds and walnuts in batches until they resembled small bread crumbs. If you don't have a grinder, you can also smash the nuts with a mortar and pestel until you get them really small. It's hard work, I know, but remember: it'll be worth it. 

Now put the nuts in a bowl and add the salt, ginger, dates, vanilla and coconut nectar or maple syrup. You are going to put your hands in there and knead the whole thing. Be careful, it's sticky! My dough was a tad too dry, so I added 1/8 cup coconut oil to moisten it. If yours is moist enough, you can skip the coconut oil. Knead until the dough is homogeneous.

Then take a 1 quart glass pan (it's important that you choose a glass pan because the dough won't stick to it) and press the dough firmly into it. You don't have to bake the cake. The coconut nectar and oil will keep it all together.

For the frosting, blend together the avocado flesh, dates, cacao and coconut nectar. This will be a softer mixture, so you'll be able to use a hand blender. Make sure it's smooth, and then spread the frosting evenly on top of the cake. Cover and chill for at least an hour before serving. 

To serve, use a sharp knife to cut triangular (or rectangular, depending on the shape of your pan) slices. And don't worry, if you pressed it well the cake is pretty sturdy so the slices won't break apart when you take them out.

Note: the original recipe uses a food processor. If you have one, use that recipe instead. 

Sunday, June 24, 2012

Beautifying, glowing and going green, all the way


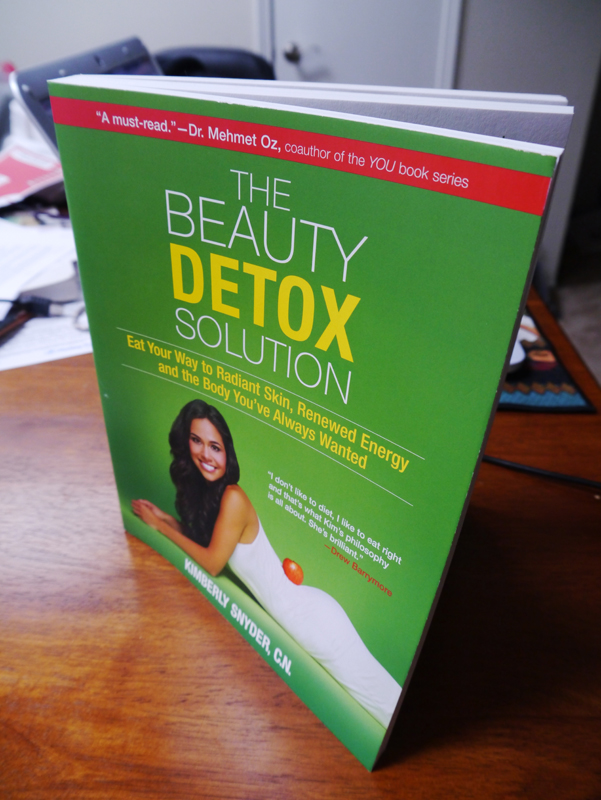
Last week I was talking about embarking on a new diet plan. Not a diet, but a solution! Sounds promising, right? Short story about how I got here: a couple of weeks ago I picked up a copy of Elle magazine from the Sacramento airport before boarding a plane back to Albuquerque. "We tested them all!," a title on the cover announced. "3 diets that really work." I flipped to the article out of sheer curiosity. Let's see what crazy things people are doing these days to lose weight, I thought. The first diet on the list was the Beauty Detox Solution, a nutritional plan created by Kimberly Snyder, a Certified Nutritionist whose knowledge and talent are touted by the creme de la creme of celebrities. Drew Barrymore and Fergie swear by her advice, the article said. So I rubbed my chin in deep thought. I was intrigued, not because the plan was recommended for weight-loss, but due to the favorable review by the Elle staffers: "I love that the focus isn't on counting calories or losing weight but on achieving glowing skin, shiny hair, and healthy digestion." Healthy digestion, eh? Gotta check this out.

So I remembered the name and the book, and a week later I picked up The Beauty Detox Solution from Barnes & Noble. It was their last copy, so I took this as a good sign - it must be popular. I read the book within a couple of days. It's not a heavy read, especially because Kim has a friendly instructive style and explains things very, very thoroughly. Her explanations also make sense, even if one is ignorant of the science behind them. 

For instance, one of the basic rules of the Solution is that fruit must be eaten only on an empty stomach. This was a blow for me, because I often have some fruit for dessert, instead of some starchy pastry or some sugary pudding. I thought this was the right way! But here's why it's not: fruits, according to Kim, are one of the most cleanse-promoting and nutrient-rich foods there are. But fruits also spoil at high temperatures and start to ferment. If we eat fruit after a substantial meal, we are queuing them up to be digested last, after the protein and starches from our main meal have been processed, which could take many hours. The chewed-up fruit will stand in line to be processed by the stomach at the 98.6 degrees inside our bodies. Now, that is a really high temperature to be keeping food. Not only will the fruit lose some of its nutrients while it's standing in line in there, but it will also start to poison our bodies as it starts to ferment. So that is why fruit should only be eaten on an empty stomach, and never after a meal.

Halfway through the book I started to really like Kim. And I decided that I would try to live the Beauty Detox way. It felt right. It also felt like a challenge, and I am always game for those. Unfortunately, in my pantry there are still items that Kim would disapprove of (mostly gluten flours - the Beauty Detox recommends gluten-free), and even though the book advises me to ruthlessly discard anything in my kitchen that's not a beautifying food (let's call these ugly foods), I am not one to throw away food. So little by little, I will try to phase them out by working them into my recipes in small quantities. This past week, for instance, I made a cranberry-banana cake with wheat germ that I didn't even get to take a photo of - it disappeared almost immediately it was so good! 

Here are some highlights of the week, in the spirit of Beauty Detox. Some of the recipes below are from Kim's blog.


This is the Glowing Green Smoothie, Kim's signature beauty drink. I watched Vince Vaughn talking about it on Letterman and then Dr. Oz drinking it on national television, so you understand how I absolutely had to make myself one. What is this concoction that famous people are praising? Well, it's definitely tasty, positively green and pretty filling. I am going to try to have this for breakfast every day for the next week. Stay tuned for reviews!


Ah, millet. The book recommends millet as a wheat substitute. To be honest, I'd never tried millet before. It looks a lot like white quinoa, but it has a softer texture. If you boil it enough and add lots of liquid, you get something that looks and tastes like mashed potatoes. This salad is Kim's recipe and contains olives, tomatoes, green onions, parsley (yet, this reminds me of Tabbouleh quite a bit!) and a delicious tart dressing. Very filling!


Home-made protein bars! Seriously awesome. Also one of Kim's recipes, these are creamy bars made of blended cashews with lime juice and other goodies. You get 10 grams of protein from just one of these small bars! If you like, you can substitute some other nuts for cashews. In fact, I just soaked some Brazil nuts to try a variation of the recipe. The process? 5 minutes to prep and blend, then freeze for 4 hours and ready. Mmmmmm!


Creamy cauliflower bisque - definitely in my Top 10 for soups! And although a blended soup with cauliflower and potatoes has a strong potential to be rather bland, the thyme and cayenne pepper in this one give it unsuspected, satisfying flavors.


cauliflower, 2 small heads or 1 humongous head, cut into florets
potatoes, 10 small (red) or 4 large (russet)
1/2 large onion
1 quart (32 oz) vegetable broth
1 cup evaporated milk (regular 2% milk or half and half will work too)
2 Tbsp butter
garlic, 2 large cloves, chopped
1/2 tsp salt
1/2 tsp black pepper
1/8 tsp cayenne pepper (ground)
1/2 tsp thyme (ground)
parsley, cilantro or green onions for garnish
cheese for garnish (I passed on this, because the Beauty Detox denounces dairy, but if you really like cheese go for raw goat's milk Cheddar)

For slow cooker: layer cauliflower, potatoes, onion, garlic, cayenne pepper and thyme in slow cooker. Pour in vegetable broth and add a little water to cover. Cover and cook on low for 8 hours or on high for 4 hours.
Blend the soup with a hand blender or regular blender, until almost smooth (I like chunks). Return soup to slow cooker. Add milk, butter, salt and black pepper and stir well. Cover and cook for 30 minutes on high.

If you don't have a slow cooker, just follow the directions and simmer the soup in a large pot, covered, for about 2 hours on low heat.

To serve, garnish with shredded cheese and the greens of your choice.

Recipe adapted from The Soup Bible.

Tuesday, April 24, 2012

Awesome fluffy cookies in 15 minutes


The other day, a friend who just returned from a long trip to China invited me over for barbecue and to see photos. And many photos there were! We munched on shish kebab and vegetable stir-fry, and then sipped our beers for about three hours while the photos unraveled on the screen. Chinese food is plentiful today in China and is very diverse and brightly-colored. Doesn't look much like the Chinese takeout you get in a hurry from the corner shop. It looks way better! In outdoor food markets, the price is uniformly 10-yuan, but the amount of merchandise one will get for that price depends largely on one's mastery of haggling. 

We also talked about a different lifestyle. It turns out that in China grown men and women congregate in the park early each morning to play games and get some exercise before going to work. All the games are collective. You don't really see people jogging or stretching by themselves. Instead, they form circles and dance and hop, engaging in what can only be described by Westerners as childlike behavior. And this all happens at -10 °C (14 °F), what is deemed a "warm winter" in Harbin. "You'll never sell an exercise program in China," my friend comments. Being active is already an integral part of their culture and their daily lives. 

Perhaps if we lived in a society where we saw more people being active, running or riding their bikes to work, incorporating physical activity into their daily lives instead of setting time aside for "working out," perhaps we'd be more tempted to emulate them. As a collective, people in any community learn from each other. Earlier this year, in Griffith Park near Los Angeles I saw a man doing handstands and yoga poses at the top of the Hollywood mountain. It was so beautiful. I wasn't that advanced in yoga back then, but I promised myself that I would train to do handstands, or at the very least headstands without assist. Without realizing, those around us - even mere strangers - inspire us. We have much to learn from other cultures, but even more so, we have much to learn from each other.

After what seemed like days of stories and photos and novelty, we helped the host pack up leftovers before leaving. I ended up taking some of the leftovers home, which I couldn't refuse, and I once again blamed my undernourished appearance for people's compulsion to force food on me. 

A few days later, I wanted to thank my friend for the good food and good company, and what better way to say thank you than with cookies? It's not just because they are gluten free, but these babies make a very tasty and satisfying dessert. If you like shortbread cookies, or those addictive Pepperidge Farm Chessmen, or the Girl Scout Trefoils (Girl Scouts, please come baaaaack) you will definitely love these!

I'm always hungry for time, so this recipe is a quick one too. Prep time was about 15 minutes and they stayed 10 minutes in the oven. The recipe makes a lot of cookies, so before you start baking think of someone with whom you can share the plenty. I ended up sending half of them to my friend and the other half, well, they didn't last too long on my counter. Don't be discouraged by some of the unfamiliar ingredients - any Whole Foods (perhaps regular grocery stores too) carries those things and they're inexpensive. Here's what you will need:

1/2 cup butter (leave it an hour beforehand to soften at room temperature)
1/4 cup agave nectar (or honey)
2 Tbsp brown sugar
1 large egg
3/4 cup tapioca flour (I used Ener-G Pure Tapioca Flour, from Whole Foods)
1-1/4 cup rice flour (bulk from Whole Foods)
1/4 tsp cinnamon
1/2 tsp vanilla extract
1 tsp baking powder

Preheat oven to 350 °F. Make sure the butter is soft - it should be neither hard nor entirely melted. Mix or whip butter, agave and brown sugar together until fluffy. Add egg and mix until creamy and fluffy. Don't panic if it looks like it's separated in the beginning, just keep mixing energetically and it will eventually hold together like this:


Add remaining ingredients and mix for about 1-1/2 minutes. This is what the dough should look like when you are done:


Place on baking tray about the size of 3/4 tablespoon, half an inch apart. If you don't have two trays, you may have to bake them in two batches. Refrigerate the remaining dough covered with plastic wrap while the first batch is baking. Bake each batch for 8 to 10 minutes.


These are happy cookies. No wheat, no dairy, no gluten and you can even substitute honey for the brown sugar to make them sugar-free too! Desserts are awesome, and don't let anybody tell you otherwise.


This recipe was adapted from the Ener-G Tapioca Honey Cookie recipe.

Friday, April 13, 2012

Whole wheat apple cake in 15 minutes


When I was younger, I used to spend Sundays with my grandparents. I'd go over to their house at lunch time and we'd spend the rest of the afternoon together, chatting and gossiping about Romanian celebrities. I remember two things were never missing in those days: coffee and cake. Grandpa would usually be responsible for making the coffee and he guarded it conscientiously too, because the brew swelled and foamed on the stove and a few times caught him by surprise and boiled over making a mess everywhere. As soon as grandpa tiptoed in, firmly grasping the tray with the steaming coffee cups, I would come to meet him halfway through the sitting room and take over the tray, relieving him of the responsibility that had him somewhat frazzled.

Grandma always came up with some sort of cake to make, getting creative with whatever she had in the pantry. Summers she made cake with cherries or apples, and in the winter with sweet cheese or walnuts. I developed a great fondness for cake growing up, and even now as I am contemplating gluten-free and sugar-free diets, these pleasant culinary temptations still haunt me. 

So I wanted to recreate the Sunday cake without grandma's help, to see if I could guess my way through. I started with Bob's Red Mill recipe for carrot cake and adapted the ingredients a bit, tweaked the quantities and voila - I turned back time and was having Sunday cake with my grandparents again. A wonderful memento and a great dessert. Not to mention it took only 15 minutes to prepare!

As a side note: I am trying to create healthier desserts, so lately I've been taking old recipes and substituting some ingredients for more nourishing alternatives. For instance, I replaced white flour with Bob's Red Mill Organic Whole Wheat Pastry Flour and I've also tried to replace sugar with honey or agave when possible. So here goes:

1/2 cup brown sugar
3 Tbsp agave nectar
1/2 cup olive oil
2 eggs
1/2 tsp salt
1 tsp cinnamon

Mix the above ingredients well. Add the following:

1 cup Bob's Red Mill Whole Wheat Pastry Flour (regular whole wheat flour will work too)
4 small apples (Pink Lady or Gala, they're sweeter), peeled and sliced (about 2 1/2 cups)
1/2 cup chopped walnuts
3/4 tsp baking soda

Mix. Bake at 350°F in a greased 8'' x 8'' or 9'' x 9'' pan until a toothpick inserted in the center comes out clean. About 45-50 minutes.

And of course, don't forget the coffee!


Saturday, March 24, 2012

Gluten-free week - day 7

We're nearing the end of this experiment and I already find myself missing it. Sure, making bread is great, especially when the bread maker makes it so easy and the loaf comes out so disarmingly fluffy and great-smelling. But I also like the challenge of doing without, of finding new things to eat, foods that we Westerners have never seen but that peoples around the world have been eating all their lives.

So I am getting nostalgic. And on this note, yesterday I took to making dishes from around the world. We started the day in Mexico, by lunch we were in India and by dinner we had arrived in Ghana. There's inspiration everywhere, and I'm definitely one to take a recipe, strip it of bells and whistles and make something quick and tasty. It may not be genuinely ethnic food by the time I'm done with it, but at least we're open to The New, right?

Avocado-chocolate pudding topped with shredded coconut. This pudding is ready in five minutes: 1 avocado, some honey, some cocoa, vanilla extract and almond milk, blended well. The best version I make is with carob powder instead of cocoa and agave instead of honey. I must have made this pudding a thousand times and I'd never get bored of it.

Palak paneer with brown rice. The green stuff came from a box from Trader Joe's, but it's made in India without mysterious ingredients and it's the most satisfying quick-meal I know.

Inspired from the Red-Red dish from Ghana, black-eyed peas and tomatoes stew with sauteed bananas. This was legendary. The stew and bananas complement each other so well! I can't imagine anyone not liking this.

Something about frying bananas in butter is SO irresistible (plus, this makes me remember Southern food so fondly).

Wednesday, March 21, 2012

Gluten-free week - day 4

One disadvantage of preparing a large batch of food is that for the next few days you'll end up eating much of the same thing. And it gets boring, it really does. Not just for you, but also for the other dwellers of the house, who will repeatedly point out how much food you prepared, make dismissive gestures at you and complain relentlessly (asking Why don't you make your own damn food? will usually shut them up).

So yesterday was the second day of ginger-orange carrot soup which - as whimsical as it once sounded - once the initial excitement wore off is just a large pot of endless orange stuff. Who wants to come over for dinner, hmm? The highlight of the day was undoubtedly the tapioca chocolate pudding with coconut milk which was stellar and which entirely redeemed the bad reputation that tapioca acquired on the previous pudding-making attempt (somebody said it had the texture of mucus - yes, he actually said that as I was eating it).

Going gluten-free is definitely enlightening, and among the initial discoveries you will make is finding out that you can make flour out of things you never suspected. There are plenty of alternatives to wheat that lend themselves to making pancakes, muffins, cookies and bread. Almond meal and coconut flour are two of those brilliant inventions. Discovering almond flour is like discovering another continent. The first time I made pita pockets I felt like Columbus, opening the oven door onto uncharted land and sitting there in contemplation, filling my lungs with the aroma of promise. But enough reverie - the photos!

Eggplant salad, which also makes a nice eggplant dip if you shovel it with tortilla chips. The best way to make this is to roast the eggplant on the stove, which gives it a nice smoky flavor. My smoke alarm is very sensitive so I opted for baking the eggplant instead and it was very tasty even sans the smoky flavor.

Pita pockets from almond and coconut flour. The eggplant stuff worked great with these. With non-gluten flours you have to use a stabilizer for the dough to stick together and not crumble away. The pita pockets are made with egg, but for bread you can use xanthan gum or guar gum as thickeners - more on that later.

Yes, they make gluten-free beer too! This one is spiced with orange peel, which gives it a fruity taste. Reminds me of Kriek and the other Belgian fruit lambics.

The star of the day: tapioca chocolate pudding with full-fat coconut milk and topped with shredded coconut and bananas.

Have you seen enough of this soup yet?

Air-popped popcorn for dinner. If you are a veritable popcorn fan, I recommend getting one of these brilliant gizmos. No oil, no mess, and you can even add melted butter if you're so inclined. As to the popcorn, be smart and always buy it organic.

Recipes for ginger-orange carrot soup, pita pockets and tapioca pudding.